
It’s essential to have the correct RH technique in order to improve in your playing. First we must focus on the right hand and the proper technique associated with it.
Having proper technique will make playing much easier and allow you to play more challenging repertoire and exercises.
Fingers and Strings
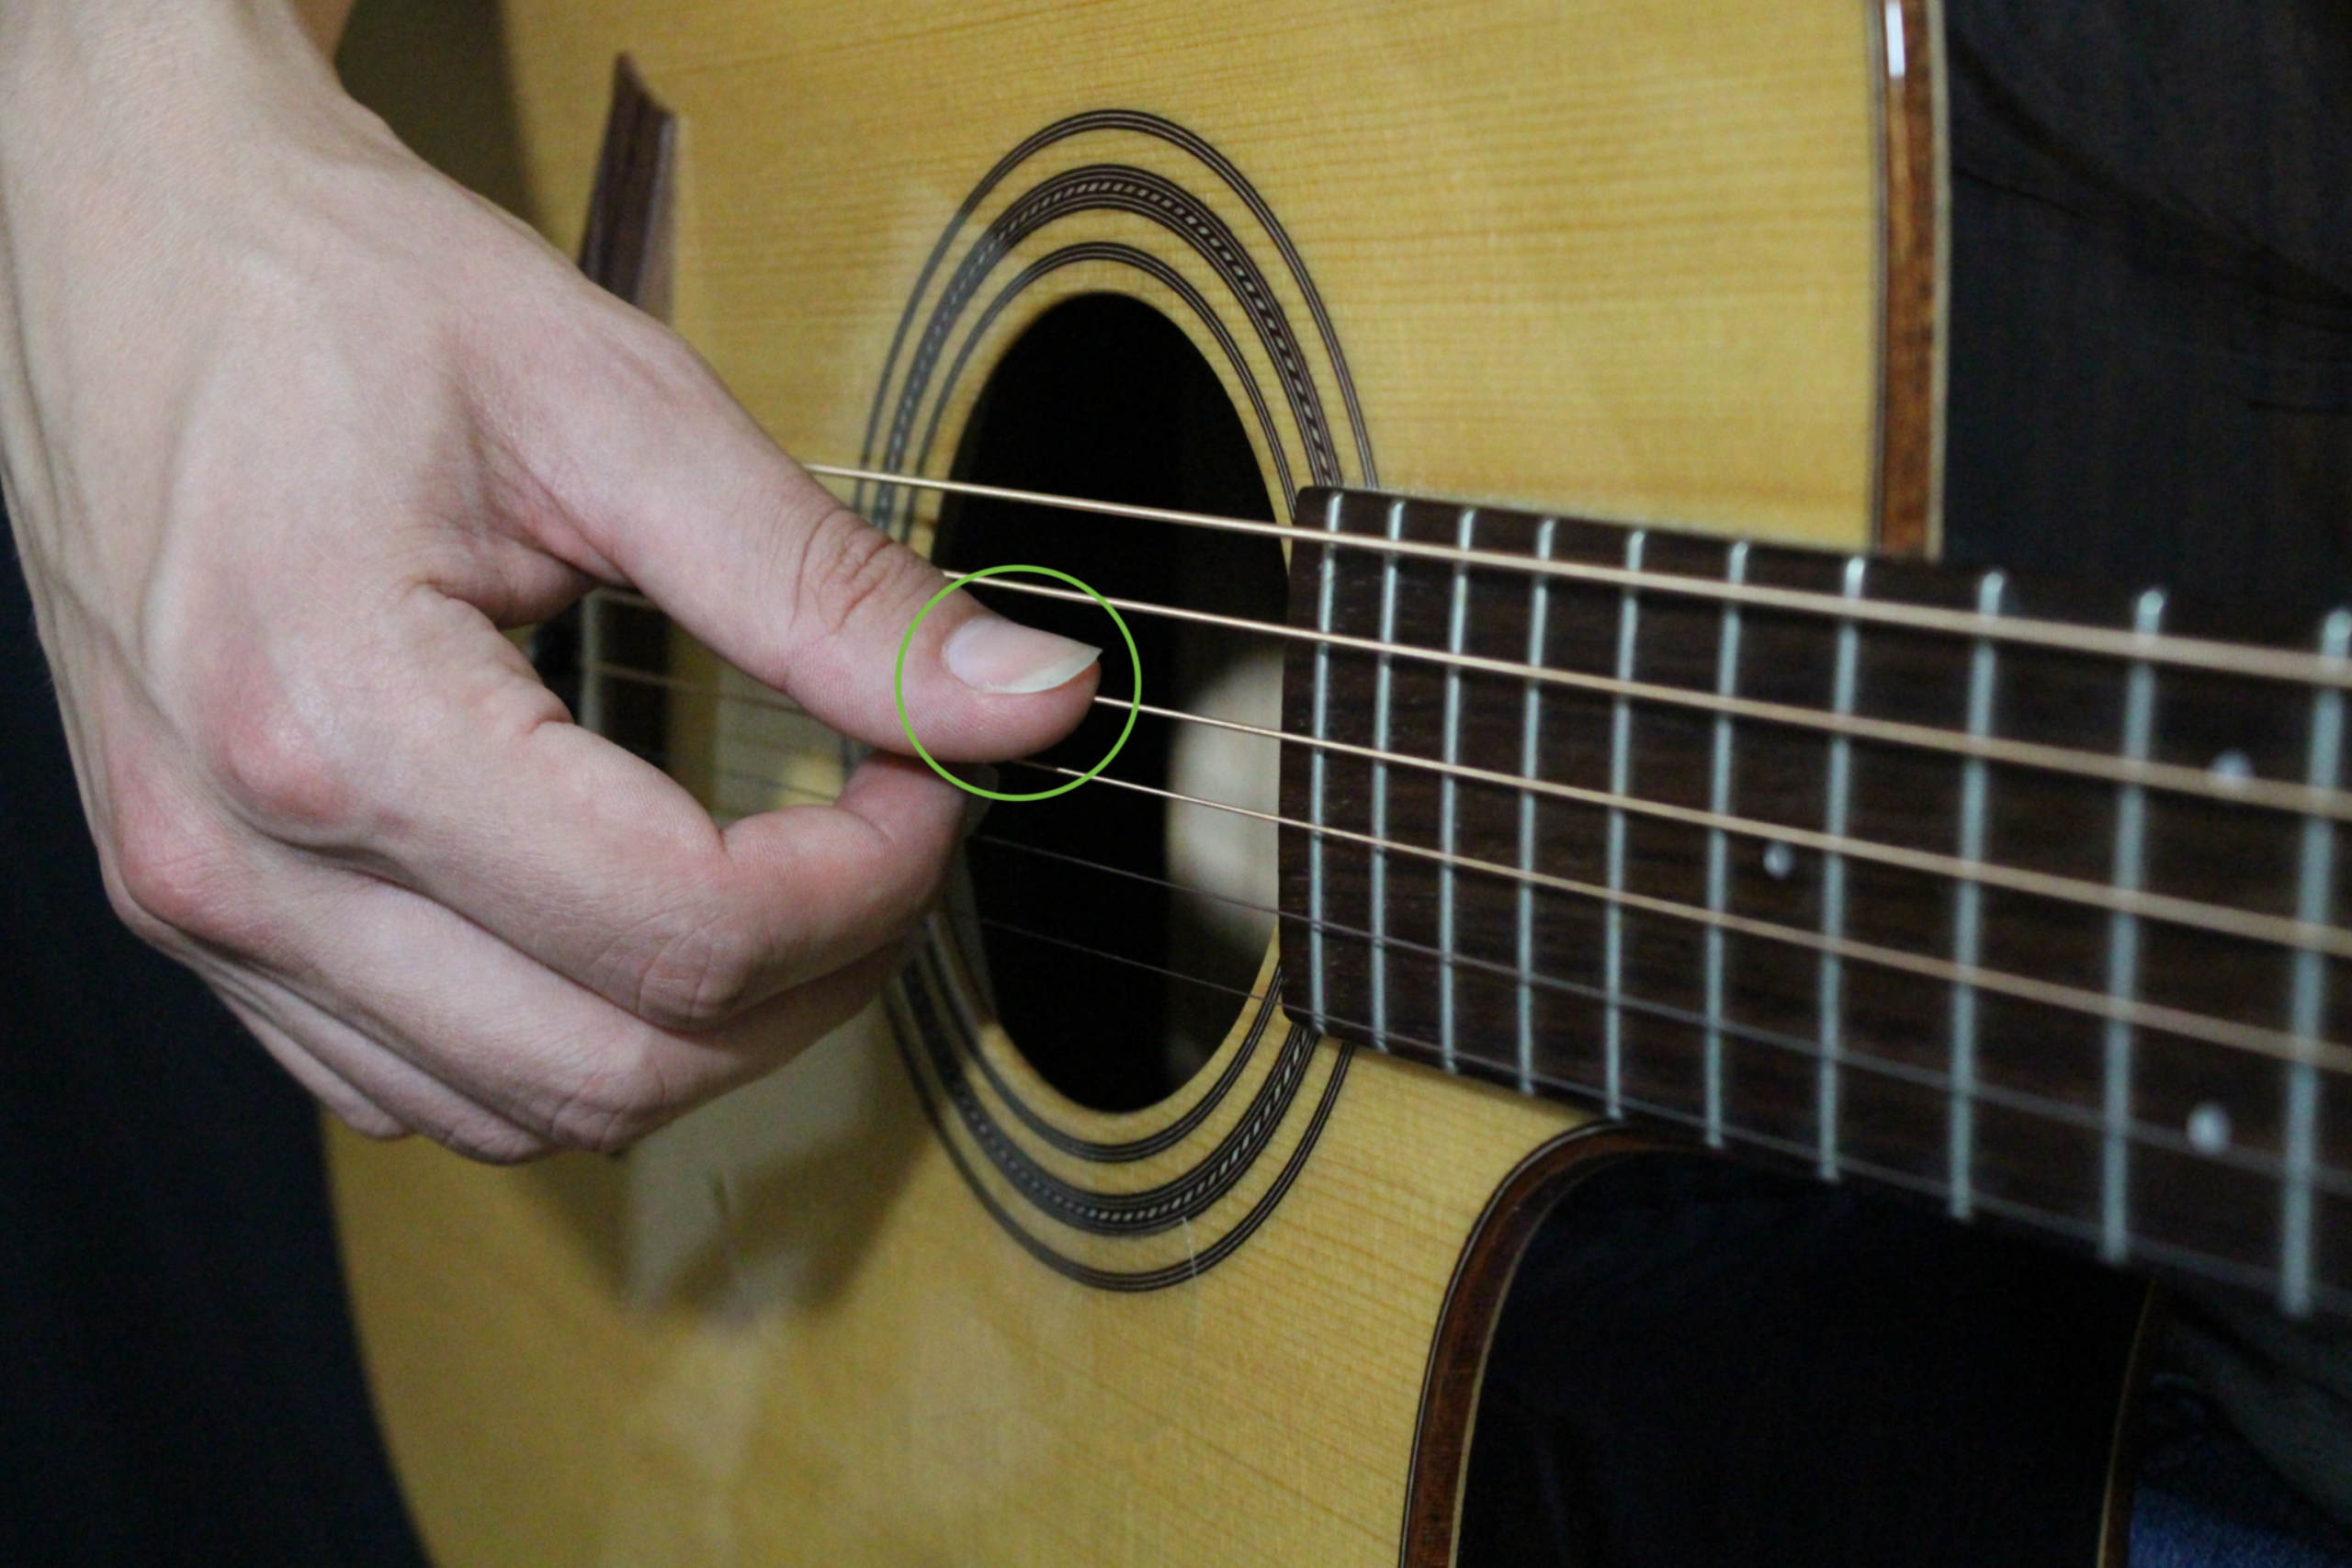
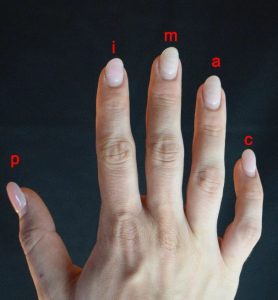
Thumb should be on the sixth, fifth, and fourth strings while the index middle ring will be on the third, second and first strings.
P = 6, 5, 4
I = 3
M = 2
A = 1
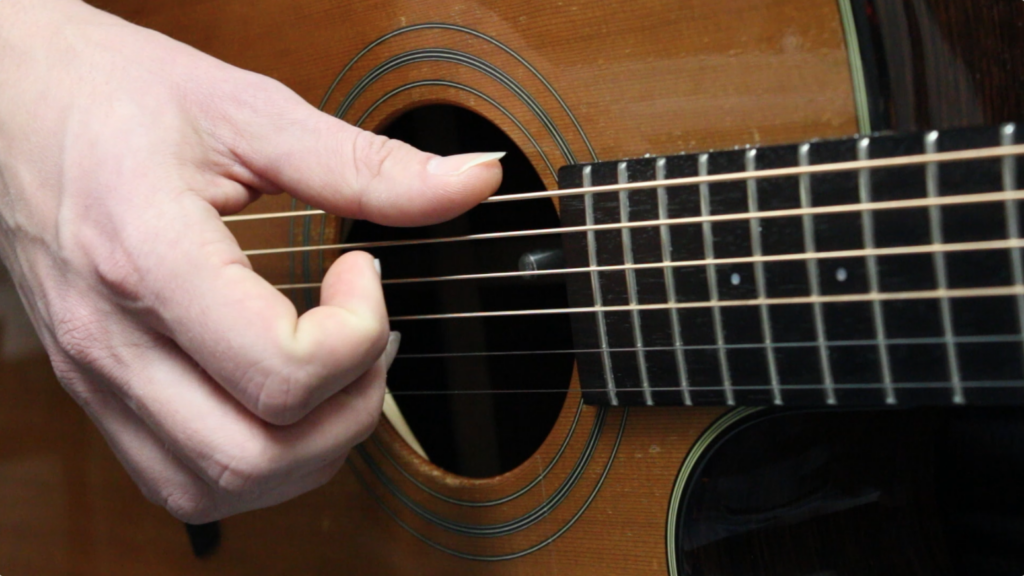
Right hand positioning
The right hand should be hovering over the sound hole in the middle. You can also place it back slightly as well for a different timbre. Make sure the right hand is relaxed while hanging over the strings.
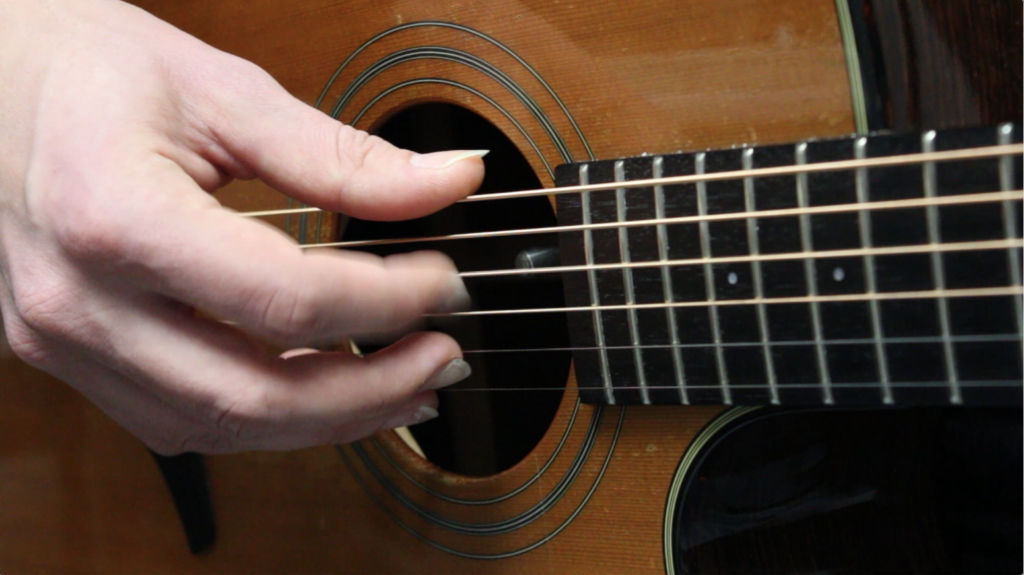
Attack motion
The attack should be a motion of the fingers coming in towards the palm. Prevent yourself from plucking up, or a clawing attack, which will cause the strings to be bright and thin.
Here is a video on beginner finger picking patterns I recommend:
Practice this with your own songs, or solely to work on your technique in order to improve your playing.
Learn more about technique through our FREE Fingerstyle Workbook!
FOLLOW US ON
Get our FREE Fingerstyle Workbook!
RELATED BLOG POSTS

Exploring Alternate Tunings for Fingerstyle Guitar
Alternate tunings open up a whole new world of possibilities for fingerstyle guitar players. In this post, we’ll explore popular alternate tunings and how they can enhance your fingerstyle playing.
What is Alternate Tuning? Alternate tuning refers to tuning the guitar strings to a different pitch than standard tuning (EADGBE). This allows you to create more resonant chords and access unique sounds.
Popular Fingerstyle Tunings
Drop D Tuning (DADGBE): Popular in rock and folk music, Drop D tuning allows for easy power chords and a deeper, fuller sound.
Open G Tuning (DGDGBD): Great for blues and folk styles, this tuning lets you play a G major chord with all strings open.
DADGAD Tuning: Often used in Celtic music, DADGAD creates rich, harmonic sounds ideal for fingerstyle arrangements.
How to Use Alternate Tunings Experiment with these tunings to discover new chord shapes, riffs, and melodic patterns. Each tuning can inspire unique compositions and variations in your playing.
Mastering Travis Picking: The Heart of Fingerstyle Guitar
Travis Picking is one of the most important techniques in fingerstyle guitar, especially for beginners. In this post, we will guide you through mastering Travis picking, a staple in folk, country, and blues guitar styles.
What is Travis Picking? Travis picking involves alternating your thumb between bass notes on the low strings while your fingers play the melody on the higher strings. This technique creates a smooth, rolling feel that’s characteristic of classic fingerstyle playing.
How to Start Start by practicing with simple patterns. For example:
Thumb (P) – 6th string (E)
Index (I) – 3rd string (G)
Thumb (P) – 4th string (D)
Middle (M) – 2nd string (B)
Gradual Speed Increase Start slow to ensure accuracy and consistency. Use a metronome to increase your speed gradually, and remember, the goal is to maintain clean, precise picking and rhythm.
Fingerstyle Guitar Exercises: Build Strength and Dexterity
If you want to master fingerstyle guitar, consistent practice is essential. In this post, we provide structured exercises to help you build finger strength, dexterity, and coordination.
Thumb Independence Exercises Start by practicing thumb-only exercises to develop independence between your thumb and fingers. Play simple bass lines while focusing on maintaining a steady rhythm.
Finger Coordination To improve your finger coordination, practice alternating between your thumb and fingers, playing simple patterns and focusing on smooth, fluid movement.
Speed and Accuracy Start slow, and gradually increase your speed while maintaining accuracy. Use a metronome to help develop timing and precision as you work through your exercises.
0 Comments